Friday, January 31, 2020

2020 Quilt No. 2... Kaffe Fassett Handkerchief Corners Part 1

Another month, another quilt, some quilts just speak to you.  I don't think I have the same color palette as the quilt in the book.  I'm learning that when you see a quilt you want to make, it's best to buy all of the fabric you need for the quilt when it's released.  These yarn dyed stripes had some beautiful red colorways when they were introduced but I've had a difficult time sourcing this group, even on ebay and etsy.

It's from the book Passionate Patchwork first published in 2001.


This is going to be interesting, the patterns are grouped in three.  A little sleuthing was necessary identifying them online. 

Not sure if this will be more complicated than the log cabin.

The pieces are stitched in the bias direction, which is something that I didn't encounter in the log cabin, but did on the jewel box quilt.  Fingers crossed it all goes well.

Time to get cutting.


Organizing boning...... gearing up to the Laughing Mercantile corset....

It's been such a long time since I bought boning, I'm not sure if these were for a specific project, or if they were purchased at a thrift store.  They had been bound together with a rubber band, but the bands fell apart, so this is my temporary solution.


Fat channels are sewn into a pocket protector, with a large straight stitch.
Since they will be sitting in a box, and not in a binder, they should keep better than wrapped with rubber bands, and you can quickly place them down on a mat, to determine what size is in each section. 7 different sizes, what was I thinking?


A more permanent solution would be using that heavy duty vinyl that Joann's sells in the home dec section.

Below February's project no. 2
Another quilt will be started while I wait for supplies.


It's going to be a great month for sewing.


Thursday, January 30, 2020

Handkerchief Linen Chemise Laughing Mercantile #115


Finished, it was a lot of hand sewing, even with joining the seams by machine, the hemming and flat felling is substantial.  I can say it's a good candidate for sleepwear, after taking a nap in it. (update: Not a good candidate for sleeping, the sleeves would need to go)  It's a blank canvas for any embellishment you might want to add.


These gussets were fun, until I had to do the other side, and the instructions were to repeat on the other side.  There is a definite order to which seam allowance you should be trimming, and which you should fold over.  I may do a tutorial on that.


Did I mention how much flat felling there was?  This was a pin baste, before the thread baste, and then the stitching while watching TV.


Two eyelets made by hand, on the inside neck binding.


They say to use cotton for the neckline binding, but what I had in the stash was too yellow.  I went with a poly satin. 


This is a mistake, do not do this.  I pulled the ribbon through, before stitching the binding down.  I managed to catch the ribbon in a few places, but gratefully did not have to rip anything out.  I did this because I thought there might be an issue getting the ribbon around the 90 degree angles.  Maybe the answer is basting the ribbon on the binding away from the stitching edge.

All in all, I recommend this pattern, the ribbon is tied on the inside of the neckline so it remains hidden while wearing.  I think the gussets make it comfortable, and the ribbon at the neckline makes it adjustable.  The pattern has the option of a lower neckline, or higher neckline, I went with the lower neckline.  

This won't be my last, there are a few other patterns waiting to be explored.


Hmmm what next...... can I finish another project before the end of the month?


Wednesday, January 29, 2020

The chemise, shift, camiseta...


I was inspired.

Never having had a nightgown made of linen, the chemise looked like a cozy option.  Made with handkerchief weight linen, and taking direction from Morgan Donner, the seams were sewn on a machine but flat felled by hand.  


There was a pattern in my stash for the chemise, and I took advantage of it.  Morgan's instructions for a larger bust, were brief,  and watching the video late at night, brief and tired, never a good combination.  The pattern used is Laughing Moon Mercantile Ladies Regency and Romantic Era Corset, Long and Short Versions C 1805 - 1840.
Purchased for the corset (it has straps!!), it makes sense to make the chemise first, so the first layer is done.


The instructions called for a 3/8" flat fell width, which look a little fat to me, but if all goes well, it won't be my last chemise.  There are so many varieties, that someday we may see another lacy version in the future.

Some inspiration for lacy chemise gowns here... Pinterest

Meanwhile.... what I find really interesting is the pattern.  Morgan's instructions call for drafting rectangles and triangles based on your measurements, the Syrian dress looks very similar with a few additions.

Morgan Donner Pattern Sketch


Folkwear Pattern Syrian Dress


The chemise pattern did not have the gores, but does have the shape, it is flared at the hem. The gusset remains, but the neckline has evolved being a separate piece with wider finished neckline.
It's an evolution of the patterns above, and with short sleeves.


What I really liked was the economy of the pattern.  With a little tweaking, I was able to to get my chemise out of 1 1/2 yards of fabric, and as this is my test garment, cheating took place with a seam up the back, and a shorter pattern length.

I actually enjoyed doing the handwork, taking breaks to clean and organize my house. 


With luck, we shall see the finished item the day after tomorrow.. stay tuned.

Tuesday, January 28, 2020

A different sort of UFO, quilted cat mats put to use


I should stop watching youtube.  My 20 year old cat needs a place to roost, and his favorite place is my human sized sofa.  It is a wonder when a 10 lb cat can displace a much larger human.  I started out looking for a cat tree house. They are very expensive, and ugly, then I happened upon a youtube video of a man constructing one out of a concrete form tube.  I thought, I can do that, there's nothing to it.  A year later... and well, it sits there mocking me.  First I had trouble cutting it, and if you have a man in your life who is a woodworker or good with tools and saws, or if you are good at that, you'll probably finish it in a weekend.  Initially, I wanted a very simple and unsteady design, just a "T" shape. My brother who took pity on me suggested more support, so we settled on this.


There's more construction that had to happen because I thought little of how this would come together.  I was just sure, I wanted it to be washable.  He has the occasional upset, and carpet would not be easy to clean.

It is covered in a vinyl upholstery cloth, picked up at a thrift store.  There is polyester batting beneath, giving it a slight puffy look, although if I were to do it again, I think foam would be a better option.

I made the mistake of taking the batting all the way in, and it is held in place by... wait for it, 3M adhesive.  Once that was done, I realized nothing else would stick to the inside. The edges were then fastened to the openings with stitching, after a grueling evening of poking the stitching holes with an awl.  This is very hard on the hands.  A cat mat was quilted, the full width of the tube, this will give it, the second layer of comfort, and cover the tube interior. Then a bit of whimsy, with a furry leopard print fabric, gifted to me by a neighbor.


This is the penthouse


This is the hiding place, although, he mostly ignores this area.


The final product... which may get some straps in the future to cover the binder clips that are holding the leopard fabric in place.


And voila!! A finished cat house, with scratching post.

Monday, January 27, 2020

The Cat Mat.... quilting practice part 2

Well, comparing the Bernina to the Singer, quilting on the Singer is more enjoyable.  It could be that since it is in it's cabinet, there is more of a continuous flat working area.  I just love the way the old Singer sounds when quilting.  I did manage to break three needles, which tells me I need to slow down a bit.  More practice means that my stitches are getting more uniform.  Slower is also more enjoyable.  I tend to do a tight stippling, and wanted to practice a bigger pattern.  Note to self though... using a thicker batting makes things more difficult to move under the foot. 
Still, happy with progress.

The needle broke right about here. As you can tell, the stitching started in the upper left, while not a tiny pattern, I was hoping for a larger stipple.  I crossed threads over once, so that's something.


Finally done quilting, I'm shocked there are no pleats, and it's so puffy.  I needed the mat to be a little stiffer than the first, so thought this overall pattern would help.  The triangular pattern and the unquilted strip down the center made it a bit floppy, that may need some more quilting.


Midway through this project, I realized that I did not have the sandwich assembled properly on my brother's quilt.  Which explains why the back looks a little baggy.  He's a boy, so hopefully, he won't notice, I will visit it and if it worsens, I'll go back in and quilt some more.


I started without the gloves, but towards the end, decided to use them.  The control over the sandwich was so much better, I highly recommend them. Nice to finally use the tools in the stash.


The conclusion to this UFO in the next post.

Sunday, January 26, 2020

The Cat Mat... quilting practice part 1


 This fabric was in the house when I moved in.  I thought maybe the previous owner was a quilter.  They were not, these were small curtain ruffles, sewn in the smallest stitch available on the machine, it was difficult to unpick the deep hem.  I need a 42" width, and that meant unpicking.  Kitty needs a mat, because I'm making him a much larger gift.  This will be 2020 first UFO completed!!


Last year, I had purchased some quilting templates at the AQS show.  These are by Cynthia Needham, I had such visions of masterpiece quilts.  Here it is 2020, and they need to be used, even if it is only a cat mat.  We all need to start somewhere.

Here we see the sandwich being made.  Then marked with the triangles & diamonds template.  Now I know, I should probably use the walking foot instead of the quilting foot, but, I want a challenge.  This will not be seen by anyone, and I need the practice.


The design is marked with the Frixion "heat sensitive" pen, and that will be another experiment.  How well will this pen hold up, and can we get it out of the cotton later. The batting is a doubled up thin polyester batting, from the remnant pile. I'm hoping to do a continuous line of quilting and want to limit the number of times the needle needs to be re positioned.


From a distance it doesn't look bad, but the stitches are not uniform, and that will improve with practice.  One thing for certain, I will need to lower the machine, or get a small Aarow rolling table to make the machine even with the table top.  One more mat to go.....


Saturday, January 25, 2020

Happy Saturday...History Bounding....

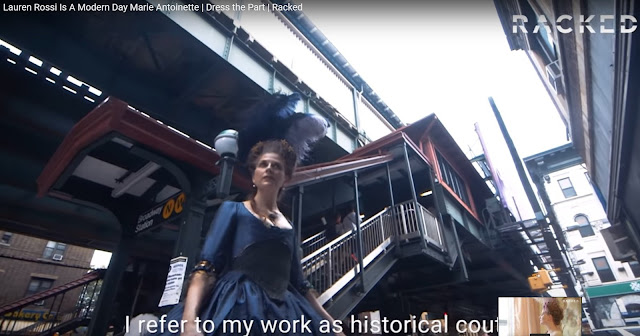
My current obsession is History Bounding where people incorporate historical clothing in their everyday lives.  Some people going whole hog, and others just borrowing details.  For your viewing pleasure, one woman, who has made it her life (outside of work).


I love the idea of going to Versailles in historical dress for a ball..... I mean come on!!


Friday, January 24, 2020

Queue for the Zoo nightshirt.... Liberty Art Fabrics

Not a lot of frills and still needs a hem, but my machine is giving me the fits.  I may have to do a post on Bernina Artista 730 (an obsolete machine) vs a vintage Singer 15-91.  The pattern was from a very old night shirt draft that mom left in her stash.  The double pockets, which are functional, are there more for modesty than anything else. The sleeves have a very flat cap, because they are wider than they look at the armhole, designed for baggy comfort.  The black piping is not filled, it's just flat, but I like just a touch of black.  The fabric was a swiss batiste purchased a long time ago, and matches the weight of the Tana Lawn. The buttons are dark grey mother of pearl.   See machine issues below... sigh, it's never easy.


There were a couple of considerations with this print, I'm not loving the way the pattern falls down the center front.

I had thought about matching the pocket print to the body print, as I had decapitated a few of the giraffes, but I decided that I liked it better when it didn't match. It also would have required more planning when I cut the pocket out, and honestly, it's only a nightshirt.  I have saved the extra fabric for a future quilt ;) If it had been a shirt, which is what the fabric was purchased for, then pattern matching would have been more important.


Hmmm something looks a little off here, uneven piping anyone?  This was the piping during the first pass on the sleeve cuff.... no this will not do.


The piping was ripped out, ironed, and what had happened was that the bias had shifted when I sewed it in above, but it's much better now.


Then disaster struck, the Bernina, which is still a relatively new machine to me, had a really great buttonholer.  However it was not working, it would only give me giant knots.  I even tried making a buttonhole on a piece of denim, and that didn't work either.  Not happy. Do you see that giant thread knot on the elephant's head?  That's all the machine would do.


The Vintage Singer 15-91, and really old buttonhole attachment, which was new to me, but allowed for an adjustable length, not available on the other style buttonholer with templates.  My buttonholes were slightly smaller than the 1/2" template.


 It had no problems at all, once it was set up properly.  That involved getting the manual out and setting everything, and you can see in the orange thread in the sample above.  It took a bit to get it the proper length and inside spacing but pleased with the result.


So the Bernina is in a time out for now..... sigh


Now for cleanup, and onto the next project..... what will that be? I'll have to sleep on it....

Wednesday, January 22, 2020

Liberty of London Tana Lawn, Queue for the Zoo Night shirt plan......

Plans for a night shirt .... this is a Liberty Tana lawn, called Queue for the Zoo.  I had to have it, the giraffes are wearing sneakers, the Elephant has a suitcase, and a parrot is wearing a fez... ahh I love funny prints ;).


This is what it looked like on the website.


And this to scale... on a dress form, it will have a direction, so I'll need to keep that in mind when placing the pattern pieces, I don't want my animals upside down.


These are the auditions for the contrast fabric.

Black organic cotton voile...


Embroidered organdy, and cotton sateen
I would love to work the embroidered panel in, but it's too short for a bib.  I may need to find another project to use it on.

More to come.....