Friday, December 11, 2020

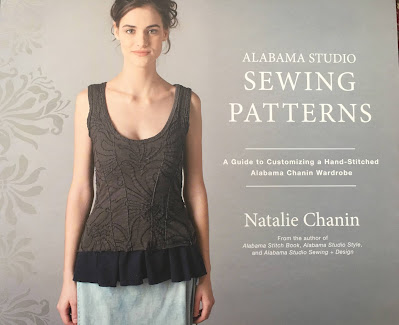
Alabama Chanin - project and the Book "Alabama Sewing Studios Sewing Patterns"


 Alabama Chanin - The School of Making Kits

Well things aren't going to plan, so it's time to realign.  I have dyed fabrics in the past with no issues, but it was with another dye.  This was done with Rit, it had been prewashed, instructions followed and fixative used.  The dye was even doubled up to get a darker color.  It looks a bit like a grunge tie dye.  It had been a bright red, and is now a streaky dirty red, which means I will need to change the plan.  The skirt can be cut out of 1 yard of fabric for my size, and since it was supposed to be doubled, the skirt layer and the cut away layer, 2 yards were dyed.  This will need to be a dress or a long skirt now, and the over layer will need to be some other fabric. I can only think that these two different shades of black are my only option, I'm out of the dyeing business for now.  


I'm playing with the idea of this treatment below, which is just straight strips, with the red below just peeking but have not decided yet... so stay tuned..


Of course, I bought the book of patterns because, I couldn't resist.  The book has a CD in the back for all of the patterns in the book.

This is what is included on the disc, sewing patterns as well as a few stencils. 

The patterns files are one sheet, more on that when I print it out.


 The knit pieces with seaming intrigue me.  We all know sewing with knits can sometimes eliminate darts, and it's an easy project but when you have more extreme curves, the fit is better if you incorporate darts, or you hide it in seaming. 

Darts


Seams

  Included in the book are the patterns for a corset type t shirt, a tunic dress, which could all produce opportunities for a nice fit, especially with more stable knits. I love that blue princess line t, I could live in that top.  The other thing that attracts me to the pattern is the high armhole which is very slimming, and I need, to deal with fluff.

Some of the fabrics she has created are pretty interesting, which is what got me hooked. Here are some examples but you can see more on the website.


The dress I'll be making will probably not incorporate the stencil I just finished, but that will be used on another project.

The book is actually pretty comprehensive, and would be a good book as a knit primer if you like the styles in it.  It doesn't go into as much detail as the Craftsy class for construction, the two together compliment each other, and if you are a visual learner, the classes are good to take.

 The Magdalena stencil is  finally completed, and it was not easy, so I'm happy to have it finished. It was the least fun I have had so far, and will look to purchase next time.


I purchased the book on the bookoutlet website, shipping took a bit longer than (about 2 weeks) but the book is new and complete, and more cost effective than Amazon ;).

Tuesday, December 8, 2020

Slow Down!! Alabama Chanin a little zen project.... pattern & stencil...

 Craftsy...Bluprint....Craftsy has Alabama Chanin (actually Natalie Chanin) herself in a few classes on their website.  Many years ago, I saw a garment in a high end outlet store, which I thought was great, but it was falling apart.  It was suffering from being on the hanger too long, and the abuse that some of these discounted garments can get.  I like the idea of creating the textile, through hand stitching, dyeing and cutting away in a reverse applique technique.  This will be a long project made up of many segments, so this is just the beginning.

If you go to her website, you'll find the kits, fabrics and buttonhole thread.  She even offers classes, not sure about these days but she did.  The garments are organic, grown in the USA and quite beautiful, have a gander at one of the kits, and you can scroll through the many different colorways on offer. I fell in love with this variation.


ALABAMA CHANIN


Now, the garment if made exactly as ordered, can be pricey ($198 for the swing skirt, plus the craftsy class or the book), but you are spared the stenciling of the design.  I'm sure the fabric is wonderful, but I had some organic jersey in the stash, and that's what I'll be using.  I was unsure about the textile paint, and the buttonhole thread, so I committed to getting that from the website and making my way with what I had on hand. They had a sale around Thanksgiving, I believe it was 20% off.


The Pattern

The pattern is included in the class material.  The garment offered in the class is a swing skirt, the pattern piece is straight forward, it's one piece cut eight times, actually 4 but the skirt is two layers.  I added quite a bit to the pattern (about 1" down the center of the pattern), preferring it to be a little bigger vs smaller.  The swing skirt is the shortest length on the pattern.


They also include these other pieces, in case you want to add more to the skirt.

The Toile

 The muslin is made from a ponte knit in the stash. It's a good shape, I'm trying to decide how to finish the seams, I would like it to coordinate with something already in my closet.  More on that later.


Then I took in the waist on all four panel seams, and made the adjustment to the pattern.


Stencil

The stencil is included in the class material for you to print out and piece, or send to office depot to print out on their wide printer.  She also includes a design release in the event anyone asks you for it. I elected to do it at home.


This is the "key" for the pieces below.


Tada....


The options for stencil  materials were limited and expensive.  I had read on a website that I can't remember now, that she went to office depot and had them run off a piece of laminate, the size of the stencil she wanted. 

Update:  Now that the stencil is cut out, it is difficult with this laminate material. It was hard on the fingers using the exacto knife and the wood burning tool created toxic fumes, and was sometimes difficult to control the melting.  So if you embark on this project, I would recommend finding something easier to cut, sending it to a company to do for you, or buying the stencil.


 It was the cheapest option for me at $15. and what you get is one continuous sheet with your design.  Now I have worked on this for about a week now.  I cut out a few pieces every day with an exacto knife, and was hoping to finish this in a week but no dice, not even half way through the stencil.  It's a little concerning that the cut outs are jagged but.... I did some further research and purchased a Plaid wood burning kit at Target.  It's a bit easier but it's a learning curve (and it produces toxic fumes), so maybe this weekend, if I cut out 10 pieces a day.

So far.... I'm into this project for....

$10 - Fabric Dye to change my red jersey to black

$15 - stencil material

$12 - wood burning kit

$48 - for the paint $28, buttonhole thread, 3 spools $10

The double fold elastic still has to be purchased, it's a wide fold over, 1" made by Mokuba, and I'm still sourcing it.  That will be another $10 aprox inc shipping.

$85 so far..... 

Now, I could have made other decisions that would have brought the price down, or I could have spent double and I'd already be on my way to a gorgeous skirt...

Time...... 


Along with the expense is the experience I will gain by going through all of the steps.  I also think that once complete, that stencil can be used for quilts ;).  Maybe I might go back to AC to pick up a completed stencil to explore other patterns.

What else will I learn? That pesky even hand stitch used in hand quilting...

What else? Painting fabric...

I'll keep you posted on the progress....


Thursday, November 19, 2020

Evening Gown turned Loungewear set more Fabric Jenga

Remember this?  I wore it once, it was a lightweight rayon jersey, and really won't get any more wear out of it.  It's time to put it into circulation.


 I had thought to chop the top off and wear it as is, but after it didn't have the weight of the skirt, the back shoulders would splay and it would fall off. Loungewear has been on my mind.

The Transformation

before & after

The bottom of the dress, will be a pair of wide legged capri pants


Using my tried and true pant pattern, I traced the curve and transferred it onto a piece of paper and over the skirt waist.


Quality control inspector

The crotch curve is cut out, then slit up the front and back fold, the edges matched to create the leg, sewn and done.  I wanted to try an uneven hem, and the dress was longer in the back and shorter in the front.  If you are going to do this at home and want to have an even hem (assuming the back is longer than the front) , you would match front panels together , and back panels together (as in the pic below), so your center front and back are on the fold, and put the pant curve on the fold (not at the side seam as below) . The front crotch seam on the front fold and the back crotch seam at the back fold.  Also, if you are using a stretchy knit, don't lower the crotch curve.  If your fabric is heavy and thin, the crotch curve will lower automatically from the weight of the fabric.


Attach some lingerie elastic to the waist, and you are done.   I like how uneven hems look, but every time I've tried to do it at home, my instinct is to fix it.  The same goes for creating deconstructed looks, I just can't leave it.  So this was a nice way to experiment with it, and If I feel like I have to fix it I will.


The top was overcast at the hem

The top back was secured with a stretch elastic to keep the shoulders together


And this is the finished product.  Some loungewear for the fall.

They are very comfortable.


This has been a good few days, some weird looking panties, silk camisole, and loungewear.  Since I've been working with elastics and that's fresh on my mind I might try another few projects with elastic.  Elastics are not that easy to master, and a warm up is essential for me.


Wednesday, November 18, 2020

Best laid plains and Fabric Jenga part 2? , just a cami

So after more rummaging through the bins, I found a skirt that was mine, that I just never gave away, because I loved it, had many happy occasions in it. This full skirt will give me two 1 yard panels, which will be 26" wide. 26" will be enough length for a blouse, or another skirt, or even if I wanted to be really decadent, the lining of another really nice skirt, a camisole tank top or a half slip.


The nice thing about repurposing is that you can take advantage of finished edges.  Here, I will take advantage of the skirt's finished bottom hem, and the center front button closure and hem on the safari top.  


I may have talked myself out of using the cream silk fabric above, because it has so much potential.... lets see what else is in the stash...  I bought this fabric, and quickly cut it into panels and sewed it up and never finished it.  It's a georgette with a yarn running through it, it is very bouncy, and inky black.  It has already been washed so no bleeding issue... could this be the "one"? 


 I pinned it on myself, and then put it on the form. Some soul searching is required here.  That will mean lopping off the bottom, that would be a lot of waste... could this work?


Haha, a bit lopsided....

What a difference a dart makes, that's better but still looks a bit slanted.


What to do... are there any other black fabrics in the stash?

Why yes there is, do you remember the evening gown I put together 4 years ago, worn once, and it's a rayon jersey, perfect for sleepwear, and there will be less waste (because I already lopped off the bottom and turned it into a skirt.  I'll just prewash the top before giving it a makeover.


Recycling is a little like fabric Jenga, but for all of my efforts.... tada!!

It looks pretty plain, but this will get a lot of wear.  I needed a tank or camisole for a shirt, I love but never wear because it's too sheer.


Here's the back, it needs a good ironing.


Had some challenges along the way, while cutting away the fabric from the lining, a dip was required, to cut out the zipper.  If you look at the back pic above, you can see the patch at top center back.


This was the patch up close.


Bias binding was applied to the neckline and armholes for a tiny facing.  All of these areas had been staystitched right after cutting.


This is the shirt, it usually gets pulled out for the holidays when the weather is cooler, because I couldn't wear it without a jacket over it.  It is very sheer despite being doubled up on the front.


No one wants to see your bra strap, but the cami is a good solution. I mean you can see the cami under the shirt, this is super sheer.


This was an excellent use of fabric because it makes a favorite shirt useable without a jacket.


I can't speculate what project will be done next.... perhaps the safari outfit will be completed.... or something else.  I'll be back for more fabric Jenga Fun!!