Slow Down!! Alabama Chanin a little zen project.... pattern & stencil...
Craftsy...Bluprint....Craftsy has Alabama Chanin (actually Natalie Chanin) herself in a few classes on their website. Many years ago, I saw a garment in a high end outlet store, which I thought was great, but it was falling apart. It was suffering from being on the hanger too long, and the abuse that some of these discounted garments can get. I like the idea of creating the textile, through hand stitching, dyeing and cutting away in a reverse applique technique. This will be a long project made up of many segments, so this is just the beginning.
If you go to her website, you'll find the kits, fabrics and buttonhole thread. She even offers classes, not sure about these days but she did. The garments are organic, grown in the USA and quite beautiful, have a gander at one of the kits, and you can scroll through the many different colorways on offer. I fell in love with this variation.
Now, the garment if made exactly as ordered, can be pricey ($198 for the swing skirt, plus the craftsy class or the book), but you are spared the stenciling of the design. I'm sure the fabric is wonderful, but I had some organic jersey in the stash, and that's what I'll be using. I was unsure about the textile paint, and the buttonhole thread, so I committed to getting that from the website and making my way with what I had on hand. They had a sale around Thanksgiving, I believe it was 20% off.
The Pattern
The pattern is included in the class material. The garment offered in the class is a swing skirt, the pattern piece is straight forward, it's one piece cut eight times, actually 4 but the skirt is two layers. I added quite a bit to the pattern (about 1" down the center of the pattern), preferring it to be a little bigger vs smaller. The swing skirt is the shortest length on the pattern.
Stencil
The stencil is included in the class material for you to print out and piece, or send to office depot to print out on their wide printer. She also includes a design release in the event anyone asks you for it. I elected to do it at home.
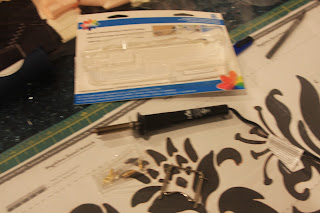
It was the cheapest option for me at $15. and what you get is one continuous sheet with your design. Now I have worked on this for about a week now. I cut out a few pieces every day with an exacto knife, and was hoping to finish this in a week but no dice, not even half way through the stencil. It's a little concerning that the cut outs are jagged but.... I did some further research and purchased a Plaid wood burning kit at Target. It's a bit easier but it's a learning curve (and it produces toxic fumes), so maybe this weekend, if I cut out 10 pieces a day.
So far.... I'm into this project for....
$10 - Fabric Dye to change my red jersey to black
$15 - stencil material
$12 - wood burning kit
$48 - for the paint $28, buttonhole thread, 3 spools $10
The double fold elastic still has to be purchased, it's a wide fold over, 1" made by Mokuba, and I'm still sourcing it. That will be another $10 aprox inc shipping.
$85 so far.....
Now, I could have made other decisions that would have brought the price down, or I could have spent double and I'd already be on my way to a gorgeous skirt...
Time......
Along with the expense is the experience I will gain by going through all of the steps. I also think that once complete, that stencil can be used for quilts ;). Maybe I might go back to AC to pick up a completed stencil to explore other patterns.
What else will I learn? That pesky even hand stitch used in hand quilting...
What else? Painting fabric...
I'll keep you posted on the progress....


Comments
What kind of fabric is stenciled? I will be interested to see how this goes. I do like skirts in Summer, not so much in Winter.