It's been pretty hectic, and there are a lot of projects in the works. One of them.... is my Ikea Rolling Sewing Table. I'm not taking credit for the design, it went through a lot of changes just based on materials, and the lack of help at the time of the project. The inspiration was this table, I wish I could remember which blog I got it from (Ikea Hack blog), but I liked the idea I could roll it out of the way when needed.

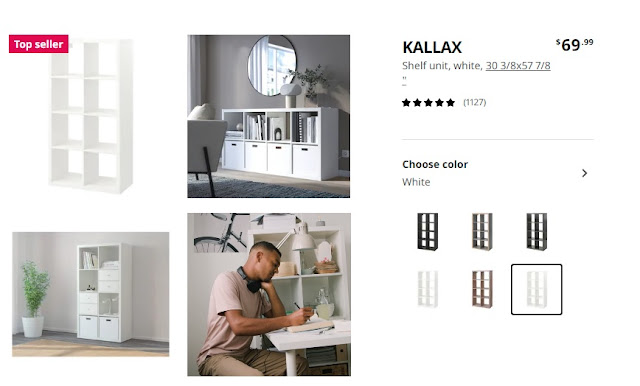
I went with the Ikea Kallax units. Originally, I had purchased a 4 cubby unit and 2 8 cubby units. The was to make it a U shape, butting the smaller unit between the two larger units on one end, but that would have made the table too large, so it's become my packing station in the corner.
 The final design....
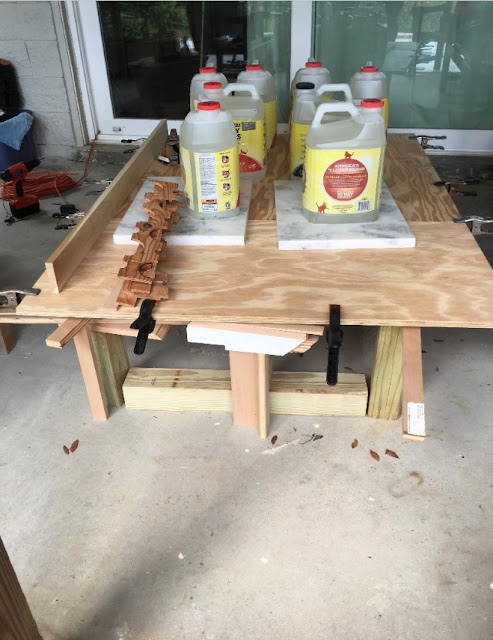
 I used two of the 8 cubby 30 3/8" x 57 7/8", and mounted them on a doubled up 3/4" plywood base. This is the laminating process, where I glued two pieces of of plywood together with some wood glue... but then... I realized one piece was bowed so I filled the kitty litter containers with water to weigh down the top pieces and hoped for the best.
Then I had some walnut veneer that has been moved around, and decided to use it. The Kallax units are held in place with wide velcro, because it was important that this unit can be taken apart. It's a requirement for most of my furniture.
My brother and I debated on how we were going to assemble this. The plywood, has four casters installed underneath it, and it was done first.
The wheels
Only four were needed with the doubled up plywood, purchased on Amazon.
Be forewarned, it is difficult to engage the brake on these wheels, but they do roll nicely on a wood floor.
So many youtube videos had the Kallax units attached to the plywood first, then flipped over. Neither of us thought that was a good idea. The velcro was attached to the Kallax units first, then the placement was marked on the plywood. We debated how we could lower the units to align them .... and this was my brother's contribution.
We put these pieces of wood down first, then put the Kallax units on top.
Once the unit was lined up, we slid the wood out from under.
The top was a piece of Birch plywood (with three coats of matte polyurethane) , the stool was a thrift store find.
In the end, the top is 4' x 8', the base is cut down to the length of the Kallax unit 57 7/8" x 3'10"'.
The overhang is 4" on one end and 10" on the other (and 1" along the sides). The 10" gives me enough space for my knees.
The edges have been finished with iron on wood banding, which sneakily makes it look like solid wood. Look for my upcoming tutorial on applying the edge banding.
Of course the holidays are here, so it's being used, not just by me, but Boots who has has a bed in the center.... must get back to Ikea for more drawers and bins.....
Holiday projects continued...


Comments