Metallic Thread on a Vintage Machine
For the experiment, we have three types of silver metallic thread.
Sulky
Gutterman
Pearl Cotton metallic

The Sulky and Gutterman were almost identical, so the
Sulky 7001 metallic silver is what was used for the samples.
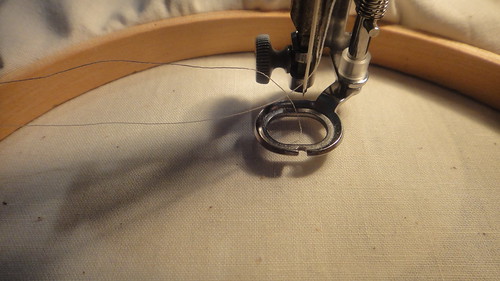
As instructed, the bobbin is wound with the metallic thread.

Then the bobbin thread is pulled up to the top.
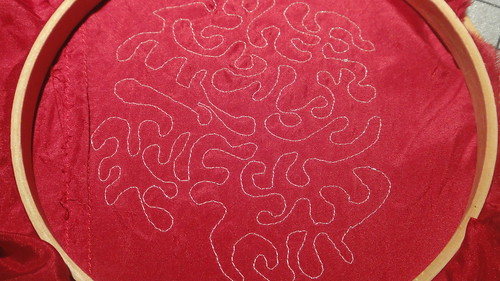
and away we go....warming up on muslin, on the pic below you can make out the tension issues I ran into with slight puckers showing up on the left side, stitches nice and flat on the right.
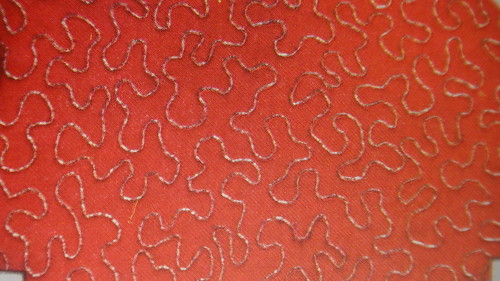
Below a sample on a quilt sandwich (no hoop, so much better control)
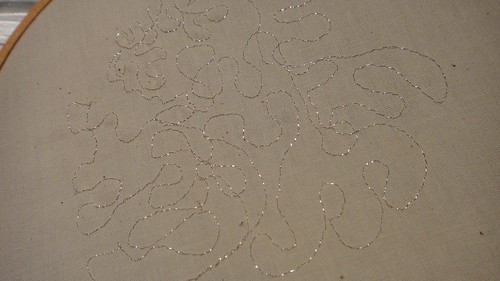
and finally on a scrap of China Silk doubled up and back in the hoop.
Wrong side
Right side

for comparison the original sample pic
Just when I thought I had a handle on this all over pattern, the hoop was my biggest obstacle, getting caught on the darning foot, and other parts of the machine. Aside from needing more practice to get those motifs the right size and uniform, the sample pic looks a little more raised than my sample.
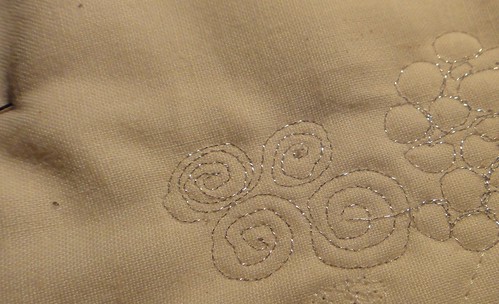
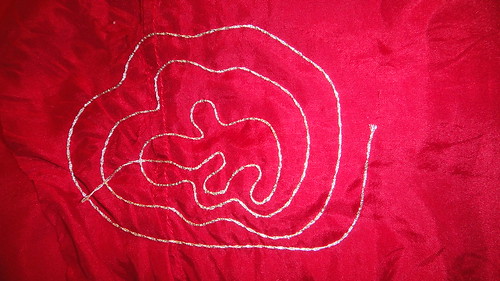
Here is the pearl cotton metallic. I embroidered over the top of the first sample, and it is more raised as you can see. What I need is a thread that is somewhere between the two. Can you tell I was tired by the time I tried this. On the Pearl cotton you can not pull the thread to the wrong side of the fabric, and you can see the knot that formed because of it on the lower center of the pic.

I also tried it without a hoop (something I do not recommend if your fabric is very thin).
In the end, I still need more practice, and a bigger hoop.
The conclusion of this project is that the fine metallic Sulky is so thin it creates a very light and lacy effect.
The Pearl Cotton metallic is very pronounced, and adds a bit of stiffness to the fabric, more so than the thinner Sulky. I am pretty pleased that the Pearl Cotton worked at all in the bobbin, it was so thick, I imagined it would get hung up. Also I have to mention that because the Pearl Cotton is a thicker thread, I couldn't get a lot of yardage on the bobbin itself. So this is something to consider if you are embarking on a project like this. Measure out the yardage on the bobbin and plan your design accordingly to minimize thread tails. If I were to do this again, I might take a few stitches to start, leaving a tail, then start the pattern. Also I would draw a light sketch of the pattern before starting.
Here is the pearl cotton metallic. I embroidered over the top of the first sample, and it is more raised as you can see. What I need is a thread that is somewhere between the two. Can you tell I was tired by the time I tried this. On the Pearl cotton you can not pull the thread to the wrong side of the fabric, and you can see the knot that formed because of it on the lower center of the pic.
I also tried it without a hoop (something I do not recommend if your fabric is very thin).
In the end, I still need more practice, and a bigger hoop.
The conclusion of this project is that the fine metallic Sulky is so thin it creates a very light and lacy effect.
The Pearl Cotton metallic is very pronounced, and adds a bit of stiffness to the fabric, more so than the thinner Sulky. I am pretty pleased that the Pearl Cotton worked at all in the bobbin, it was so thick, I imagined it would get hung up. Also I have to mention that because the Pearl Cotton is a thicker thread, I couldn't get a lot of yardage on the bobbin itself. So this is something to consider if you are embarking on a project like this. Measure out the yardage on the bobbin and plan your design accordingly to minimize thread tails. If I were to do this again, I might take a few stitches to start, leaving a tail, then start the pattern. Also I would draw a light sketch of the pattern before starting.


Comments
Another thing you can try is to use 2 or 3 strands of the thinner thread. Take 2 strands of the length you need, hold them together side by side, and wind them around the bobbing together. Your machine will treat the 2 strands as one.