VPLL Challenge pattern #0336 Ladies Princess Slip - Progress 2
I should be finished but I'm not :)
When last we left the slip there were still a few things that needed to be solved.
1) Front closure
2) Neckline treatment (without the lace / ribbon insertion)
3) Flounce hem
4) Armhole finish - this will be the next post with the finished garment.
1) The front closure - check!!
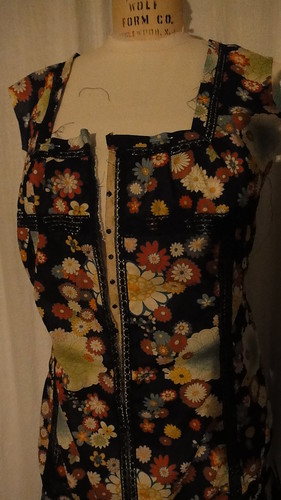
I inserted the selvage of a silk dupioni about 1" wide and sewed tiny (but freakishly strong) snaps to it. The other side of the snap hides behind the opaque oval in the lace. It looks pretty good and a bit vintagey.

2) Neckline - check!!
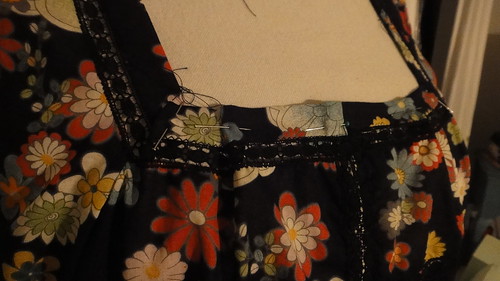
Joined the 1/2" lace around the neckline, then prepared a 1" wide tube of the same fabric and added that. This would have been where I would have inserted the ribbon, the slip gapes outward along this edge, so I've added little back pleat, and two small pleats in the front to keep it from falling open.


3) Flounce hem - check!!
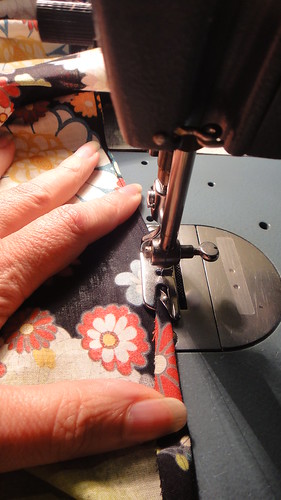
Now this one I am excited about, since the flounce is cut on the straight and it is 180" long, I wasn't going to finish it by hand. This turned out to be a real time saver.

I remember when my mother bought this attachment, she was so excited. When I was younger I loved wearing long fluid full circle skirts and mom used to finish them by hand. This is what she bought the attachment for, and she said it took a bit to get the hang of it but it went very quickly once she did. This is when you need sewing friends, to gush about new attachments LOL.
It makes the nicest tiny hem ever.

Here is a most excellent tutorial on youtube from Brian Sews.
And 180" took 7 minutes.
Do I dare use it on the armholes?
When last we left the slip there were still a few things that needed to be solved.
1) Front closure
2) Neckline treatment (without the lace / ribbon insertion)
3) Flounce hem
4) Armhole finish - this will be the next post with the finished garment.
1) The front closure - check!!
I inserted the selvage of a silk dupioni about 1" wide and sewed tiny (but freakishly strong) snaps to it. The other side of the snap hides behind the opaque oval in the lace. It looks pretty good and a bit vintagey.

2) Neckline - check!!
Joined the 1/2" lace around the neckline, then prepared a 1" wide tube of the same fabric and added that. This would have been where I would have inserted the ribbon, the slip gapes outward along this edge, so I've added little back pleat, and two small pleats in the front to keep it from falling open.


3) Flounce hem - check!!
Now this one I am excited about, since the flounce is cut on the straight and it is 180" long, I wasn't going to finish it by hand. This turned out to be a real time saver.

I remember when my mother bought this attachment, she was so excited. When I was younger I loved wearing long fluid full circle skirts and mom used to finish them by hand. This is what she bought the attachment for, and she said it took a bit to get the hang of it but it went very quickly once she did. This is when you need sewing friends, to gush about new attachments LOL.
It makes the nicest tiny hem ever.

Here is a most excellent tutorial on youtube from Brian Sews.
And 180" took 7 minutes.
Do I dare use it on the armholes?

Comments